

Record lecture material
There are many different ways to record movies to create digital course material. The ICT educational developers and media technicians can support you with this.
Content on this page
Click on the links to go directly to the section.
- Plan your recording
- Screen recording
- Record in our self-service studios
- Record with the support of a media technician
- Audio recording
- Publish your movie or audio recording
Plan your recording
There are a number of tools for creating different forms of digital course material, what will work best can only be decided by you, since you know your course and subject best. Whatever method you choose, there are a few things to consider:
Clarity and conciseness
It's important to try to be short and concise regardless of form. Feel free to think modularly / in terms of title, so that your productions are short and concise. It is always better to divide the material into several parts than to try to imitate the classroom situation with a 45 minute lecture. Some production methods, such as sofa conversations between several participants, often work in a slightly longer format, while recorded reviews using powerpoint will quickly result in the audience losing interest if the recording is too long.
Always prioritize sound
No matter what type of production you are making, make sure to prioritize the sound. It does not matter how interesting the video material, ppt images or other visuals are, because it will fall flat if it is not possible to hear what is being said. Always use a headset or other external microphone for your various recordings.
Use the possibilities of the medium
Try to exploit the potential of the chosen media form. If you have a lot of visual material to display, the video format will work well. The same applies to laboratory work, tests and processes. If, on the other hand, you are presenting pure theoretical reviews, it may work just as well with a sound recording or with a voice over to a powerpoint. Try to avoid including too much text information in your production as it quickly can become difficult to read and absorb.
Practice again and again
Remember to practice before you start your recording. To record is a new situation and there are several things to keep track of. Also keep in mind that it does not matter if it goes wrong on the first try, pause the work and try again because it is guaranteed to be better the second time. Strive for a good enough quality for the purpose of the film and do not spend an unreasonable amount of time on details to reach perfection. If you have followed the advice above about trying to divide your work into smaller parts, it will also be easier to re-make.
Record a video with Kaltura and Screen recording
A very popular way to create course material is to record your screen along with your voice. Screen recording is the perfect tool if you want to create instructional material in various digital tools or quickly go through a specific digital material such as a Word-file. Screen recording is also the easiest way to make a movie of your powerpoint by simply adding a voice to your slide show. There are two ways to make a screen recording and these are:
Screen recording
A popular way to create course material is to record your screen along with your voice. Examples of uses are instructions in digital tools or going through a word file on your screen. Screen recording is also the easiest way to make a movie of your powerpoint by adding a voice to your slide show. Today there are two ways to do screen recording and these are:
Kaltura Capture - en part of HV Play
The advantage of using Kaltura Capture is that the film is uploaded directly to your HV Play to then be able to be shared further, e.g. published on Canvas or share the link to the movie. If this is your first time using Kaltura Capture, you have to install it on your computer.
Recording in Zoom
If you are used to Zoom, it may be a first choice for your screen recording. The film shows how you can most easily choose the right window to record.
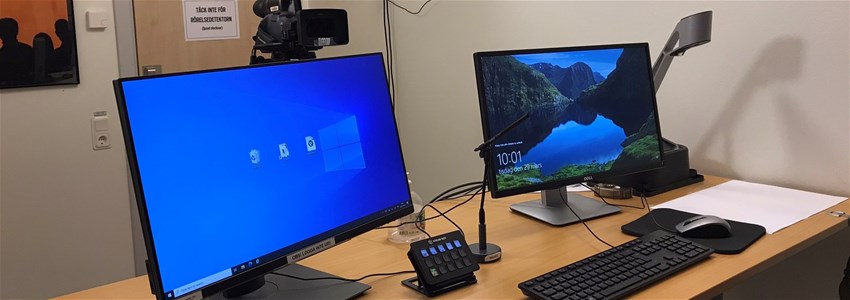
Record in our self-service studios
In Kreativt Centrum there are two studios where you record on your own. Here you can read more about these studios and how to access them.
Recording studio - H109
In the studio you can record yourself, your screen or with a document camera. Here you can read more about how to use the studio and get access to it.
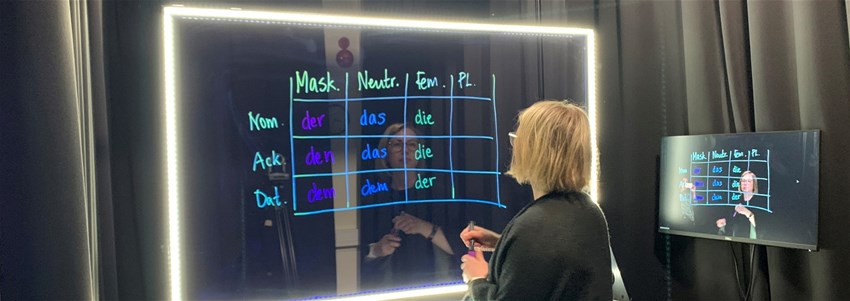
Lightboard studio - H106
In the studio, you write on a whiteboard made of glass that is filmed from the front. Here you can read more about how to use the studio and get access to it.
Record with the support of a media technician
If you want to record video material and get a professional result, the best way to do it is in our video studio. You can also get help with all the technology and recording materials from our media technicians so that you can concentrate on what is to be said. In our studio, we make everything from lecture-like productions where you and your powerpoint are recorded to interviews and discussions. Below you will find some examples of what we can help you with. If you are interested in recording in our studio, please contact the media technicians to book an appointment. The media technician can also help with other types of media productions.
Audio recording
Creating audio files today is relatively easy as you can actually do it with your mobile phone or your computer and headset. If you want to take it a few steps further, maybe it is a podcast together with some colleagues that is the best option for your course. Our media technicians can always help if you need assistance with recording podcasts or other audio productions. Contact the medie technicians to book an appointment.
Voice Recorder in Windows
Voice Recorder is an app for recording lectures, conversations and other sounds and you can find it in your menu on your computer. Remember to use a headset or other external microphone for the best sound quality when recording. Instructional video on how to use the voice recorder:
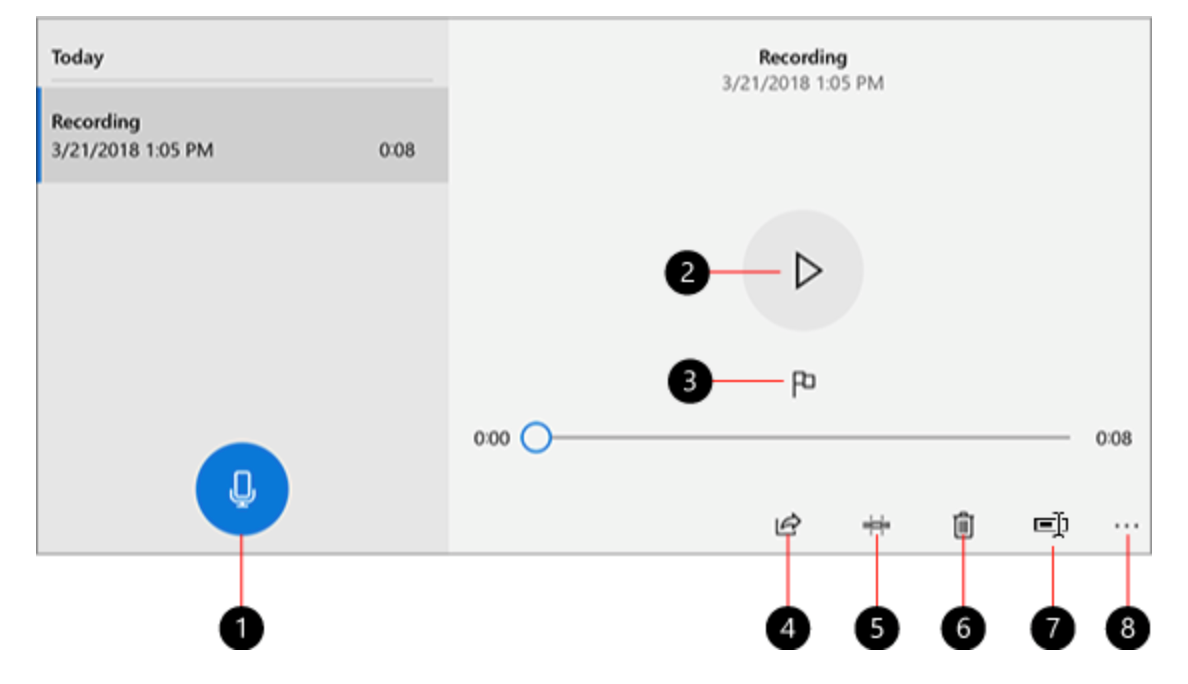
When the program is started, you will see the following image.
Sound recording
- Press the large recording button (1) and start your recording. You will get blue circles indicating the recording volume while you are recording. If you have several audio sources connected to your computer, select the source under the dots (8).
- When the recording is complete, you have the option to edit the start and end of your recording using the trimming function (5) and rename (7).
- The file is saved in Documents> Audio.
- To delete your recording, select Trash bin (6).
- Under the three points (8) you will find more options for managing your recording
When your recording is ready, you can upload it to HV Play for further distribution. It's a good idea to add a cover image, a thumbnail, that describes it as an audio file.
Publish your video or audio recording
Once you have made your movie or audio recording, it needs to be uploaded to a streaming service. University West has HV Play. After uploading, the film can be published in Canvas or shared in another way. Here you can read about how to use HV Play.